![[ProjectSTi]](https://blogger.googleusercontent.com/img/a/AVvXsEgqVanZg9w-c4hS30-vwmY1vqbhTqkAlpb0a2RMSq9lGDlNvjWa6PF_M3Dcb_y6Lzef4wChPlx3cJivdW2n8v3tjZ8PrUJzH4D7Ktx4Jhzz0H0hrUmEXP80ofkZt9y5xM1irMQWm787FTXxzia9UsFrNI3MwfiwgLlTpAO-55uip-USRGdOW4WYicZieO0=s174)
Today was a seriously good day!
After checking the bearing clearances yesterday, using plastigague, I felt confident that bearing clearances for oil flow were within factory spec.
Although I was using all new parts, you can't assume that the clearances will be OK.
I cleaned and dry assembled the bottom end and placed a strip of Plastigauge across each main bearing, and then torqued up the block to spec. Without rotating the crank, I then disassembled the block again, and the strip of plastigauge was now crushed. There was a measuring guide provided and this is used to compare to the pastigauge to determine the actual side of the strip which then shows you the clearance.
Thankfully they were all good! I could then strip everything again and yet more cleaning to prepare for the final build.


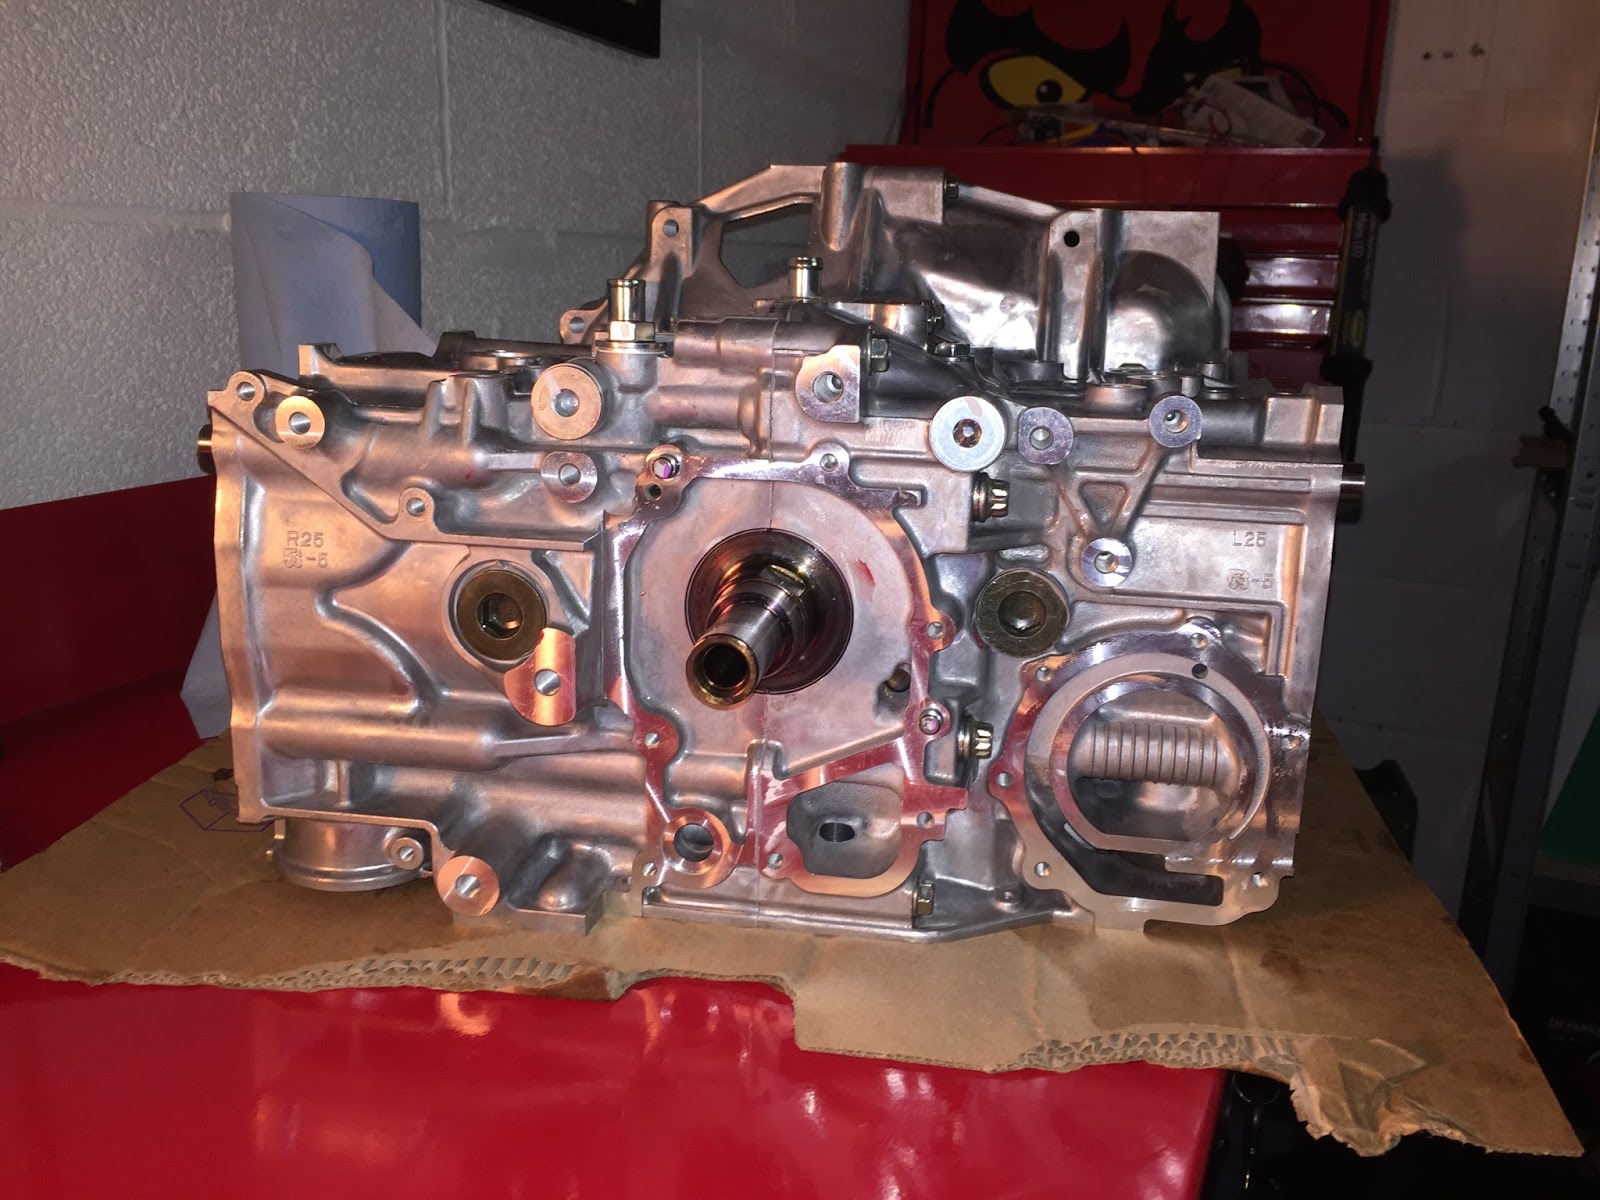
This morning started with a final cleaning of parts, then assembly of the bottom end. Assembly lube was added to the crank journals and main bearing surfaces in the block halves.
The con rods were torqued to spec and the crank set in place on the right hand case half. O Rings were placed in position for the oil and water channels, and next came the difficult bit....
I had to add sealant to the case halves, along a specific pattern as detailed in the manual. The sealant seals the outer section of the case halves to stop oil leaking out, and also water and oil channels from mixing, internally.
I used my finger to spread it around, being careful not to get too close to the crank and main bearings. Some of the bolt holes are very close so you have to remember that once the two halves are placed together, the compression will squeeze the sealant out, so you risk getting it onto your bearings. The problem is you will never know as you can't see it. This is where "experience" comes in. I used my best judgement, smoothed the sealant off and then set the LH case half on top. The case bolts, along with new sealing dowty washers were added and the two halves torqued up to spec.


After a quick lunch and more caffeine, it was time to add the pistons.
You have to match up the piston rings (which you have re-filled the previous day and clearances set to each cylinder) and put the rings on the piston is a certain pattern. Each manufacturer is different, but with the piston on the bench, there is an arrow pointing to the forward of the engine.

You then put the rings on, and the top and second compression rings are 180 deg apart, to aid gas pressure on the rings when under loads.


The oil control ring was fiddly to install, but once in place, you then need to instal the gudgeon pin clip on the opposite side of the piston, to the access hole in the block. You then apply the ring compressor and compress the ring pack and gently tap the piston into the block. Be GENTLE! If it stops, don't force it, remove and restart. You will snap a ring if you force it!!!
 The you gently rotate the crank and match up the con rod with the piston hole. Apply lube to the gudgeon pin and push in. Then finally, add the second gudgeon pin to lock the pin in place. Do the same for the next 3 cylinders and the give it rotation by hand to check all is good!
Finally, install the access hole plugs with new gasket and torque up to 70NM. Then the oil separator plate and torque up....this needs sealant too, otherwise you can get oil into the bell housing and ruin a clutch later on!


After checking the bearing clearances yesterday, using plastigague, I felt confident that bearing clearances for oil flow were within factory spec.
Although I was using all new parts, you can't assume that the clearances will be OK.
I cleaned and dry assembled the bottom end and placed a strip of Plastigauge across each main bearing, and then torqued up the block to spec. Without rotating the crank, I then disassembled the block again, and the strip of plastigauge was now crushed. There was a measuring guide provided and this is used to compare to the pastigauge to determine the actual side of the strip which then shows you the clearance.
Thankfully they were all good! I could then strip everything again and yet more cleaning to prepare for the final build.
This morning started with a final cleaning of parts, then assembly of the bottom end. Assembly lube was added to the crank journals and main bearing surfaces in the block halves.
The con rods were torqued to spec and the crank set in place on the right hand case half. O Rings were placed in position for the oil and water channels, and next came the difficult bit....
I had to add sealant to the case halves, along a specific pattern as detailed in the manual. The sealant seals the outer section of the case halves to stop oil leaking out, and also water and oil channels from mixing, internally.
I used my finger to spread it around, being careful not to get too close to the crank and main bearings. Some of the bolt holes are very close so you have to remember that once the two halves are placed together, the compression will squeeze the sealant out, so you risk getting it onto your bearings. The problem is you will never know as you can't see it. This is where "experience" comes in. I used my best judgement, smoothed the sealant off and then set the LH case half on top. The case bolts, along with new sealing dowty washers were added and the two halves torqued up to spec.
After a quick lunch and more caffeine, it was time to add the pistons.
You have to match up the piston rings (which you have re-filled the previous day and clearances set to each cylinder) and put the rings on the piston is a certain pattern. Each manufacturer is different, but with the piston on the bench, there is an arrow pointing to the forward of the engine.
You then put the rings on, and the top and second compression rings are 180 deg apart, to aid gas pressure on the rings when under loads.
The oil control ring was fiddly to install, but once in place, you then need to instal the gudgeon pin clip on the opposite side of the piston, to the access hole in the block. You then apply the ring compressor and compress the ring pack and gently tap the piston into the block. Be GENTLE! If it stops, don't force it, remove and restart. You will snap a ring if you force it!!!
Finally, install the access hole plugs with new gasket and torque up to 70NM. Then the oil separator plate and torque up....this needs sealant too, otherwise you can get oil into the bell housing and ruin a clutch later on!
Comments
Post a Comment